Build your own media-center (TV-Vlaanderen)
Posted in "News"MythTV Kodi TV-Headend TV-Vlaanderen Satellite Mediacenter
I haven't posted anything for a year now because last year, 2012, has been quite a busy year, and still some busy times ahead though. But I thought it was really time to post something new, in particular a mix of old and new information about the media-center build. I'll try to be as complete as possible and more articles will need to follow to cover every part of the build, so here we go...
In 2010 I have built my own media-center. Digital TV was becoming more and more popular and in Belgium and we have several choices, but all of them are limited (they offer their own hardware) except for TV-Vlaanderen which is kind of "open source" and leaves the choice of hardware to their customers.
I've considered Telenet and Belgacom, both of them allow you to record and pause Live digital TV. But you still need a DVD/Blu-Ray player for your movie collection, you still need a pc or other solution to play your digital music collection and so on. So I was determined to try to setup my own media-center of choice which can do all of these things in one box without having a pile of audio/video equipment stored in your living room. It also had to be very easy to use, as we tech-guys say: "it has to be girlfriend-proof"!
I found lots of nice media-center software around, but when reading and comparing all technical information about each piece of software and their hardware requirements, I found out that not all hardware was compatible with each piece of media-center software. So I needed to take things easy and think about what road I wanted to follow here. Let's take a quick view of the possibilities.
1. A few media-center choices:
1.1 Choosing Microsoft Windows media-center.
Back then I would have needed a FireDTV of FloppyDTV card to work together with TV-Vlaanderen (today more cards are available). Also I would need to pay a Microsoft Windows license which would make the build a lot more expensive and If I would like to watch on a second TV, I should have bought a media center extender such as Xbox. Also Windows is more demanding concerning hardware, so building this would become a lot more expensive.
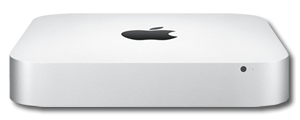
1.2 Choosing Apple Mac mini with EyeTV.
There's a nice solution from Elegato to watch satellite TV on your mac or mac mini, it's called EyeTV. So I could have chosen a Mac mini with Eye TV which works very good, but that still doesn't solve the second TV problem, because you should buy a Mac mini and EyeTV for each TV you want to connect and want to be able to watch live TV on. I would have to install coax cabling then in each room which wasn't and still isn't an option in a older house where all electrical parts are already installed and no building renovations are to be done in the next few years.
1.3 Choosing Linux and MythTV.
Linux offers several software alternatives that can handle a TV signal and allow you to watch live TV and which are quite good as well (VDR, TVheadend, MythTV, ...)! But there was one that immediately drew my attention, MythTV. It works with a back-end which handles the TV signal and decoding, and you can watch using several front-ends across your home (and beyond if you like). You can add as many tuners as your backend hardware allows and you can even watch live TV using your laptop (considered that it is running Ubuntu or MacOSX). All runs well over a cabled ethernet network and even on wireless (if you have wireless-N access points). You can even choose your own front-end media-center software to watch TV (MythTV's own frontend or XBMC). And maybe the most persuasive aspect, all software is completely free to use!!
2. Experience:
I had made my choice and used MythTV with XBMC which after two years of using it, I can say is really great! Watching TV over wireless even works which comes in handy during summer time (watching Tour de France with a beer in a lounge chair in your garden for instance). Although you do need a good stable WiFi signal for HD content, all SD channels work quite great over a wireless connection. Note: For my last Operating System upgrade of our media-center to Ubuntu 12.04 LTS (old version was Ubuntu 10.04 LTS) I have used MythBuntu, which is a all-in-one solution. It's the normal Ubuntu as we all know, but completely prepared to use with MythTV, so you don't need to first install Ubuntu and then all MythTV components, it's already there. You have same variants for some other Linux distributions as well such as KnopMyth (based on Knoppix), MythDora (based on Fedora), ...
3. MythTV setup:
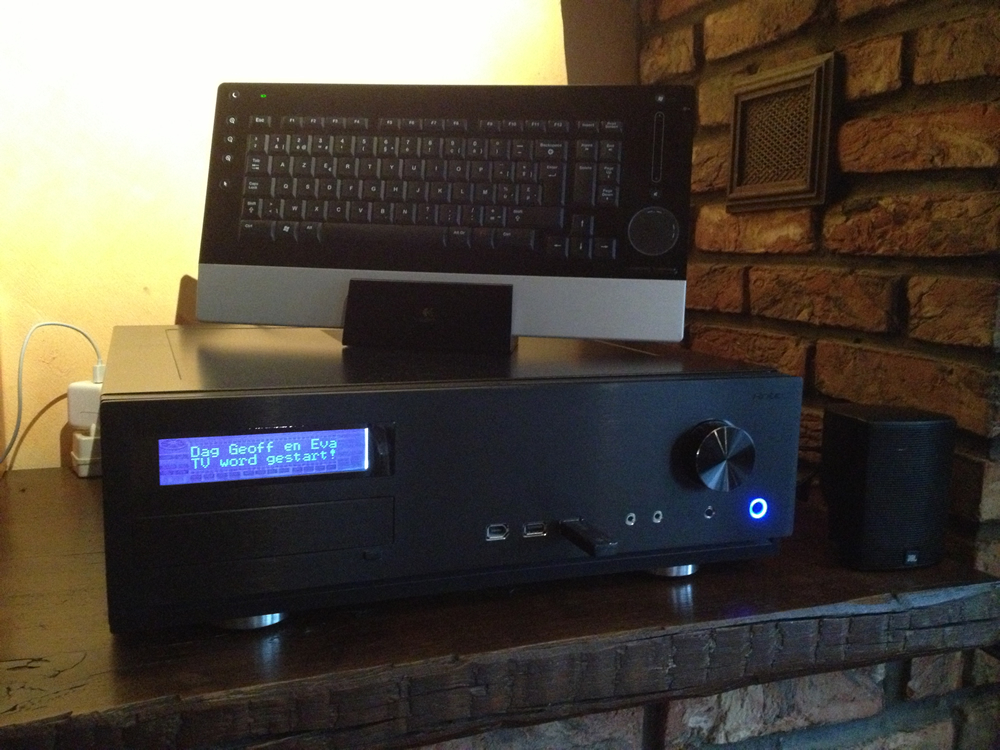
My current setup consists of a combined back and front-end in the living room als you can see on the picture with this article and another front-end in the bedroom that connects to the back-end in the living room. But you could do a setup like the one on the picture below easily if you have all the hardware. Anyway, you'll get a good impression on how it all works!

Get the full MythTV diagram here.
4. Choosing your hardware:
Choose your hardware carefully, check if all your components have Linux drivers and are well supported! Below you'll find my setup in detail, I hope it helps you when choosing your hardware.
4.1 The case:
Many different cases are available, take a look here for instance. There are also some high-end models too, Streamcom has some nice ones. But I have chosen for a less expensive model from Antec. The Fusion Remote Black comes in with a remote control, IR receiver and a LCD/VFD display, it also has good support too in the Ubuntu forums for setting up the remote and the display!
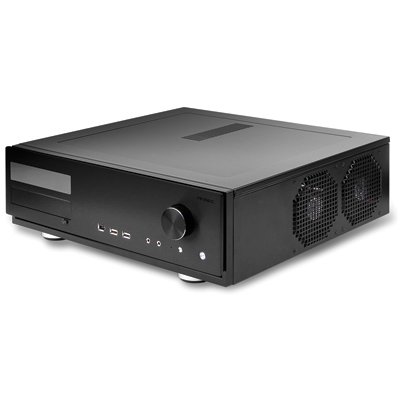
The case has two 3.5 inch drive bays available for hard disks, one 5.25 inch bay for your DVD or Blu-ray player. But be aware, it can only hold microATX motherboards! More info about the case http://store.antec.com/Product/enclosure-veris_media/fusion-remote-black/0-761345-15735-3.aspx.
4.2 The motherboard:
I have chosen an ASUS M3N78-VM board which holds an onboard graphic card with NVIDIA GeForce 8200 chipset (which has native support in Ubuntu). It has a VGA, HDMI and DVI output. It also includes an 8-channel analog and optical S/PDIF audio output. The board is also equipped with a raid controller which can handle raid 0, 1, 0+1, 5 and JBOD. I'm not using this for the moment, but it could be useful if you want to set your system up with raid 1 level (mirror copy). Other raid levels will not be possible because the case only holds two 3.5inch drive bays and if you want to use raid 5 for example, you'll need a bigger case which can hold more disks.
You can find more info about the board here: http://www.asus.com/Product.aspx?P_ID=ovqEgLFRjnSClhSV
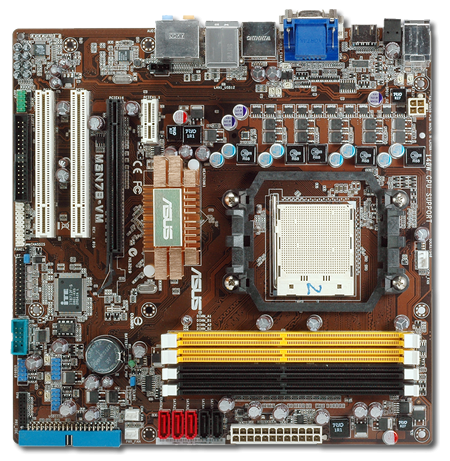
Important! To avoid configuration problems, choose a graphic card or motherboard with a Nvidia chipset. Unlike ATI, open source drivers for NVIDIA nForce hardware are included in the standard Linux kernel and leading Linux distributions such as Ubuntu.
4.3 The tuner card:
I have chosen for the Technotrend TT-budget S2-3200 DVB-S2 card. It is a budget tuner card which is capable of handling HD content. (That's what the S2 stands for) and there was already CI module standard included.
- Technotrend S2-3200: http://www.technotrend.eu/2711/TT-budget__S2-3200.html
- Technotrend CI: http://www.technotrend.eu/2787/TT-budget_CI.html
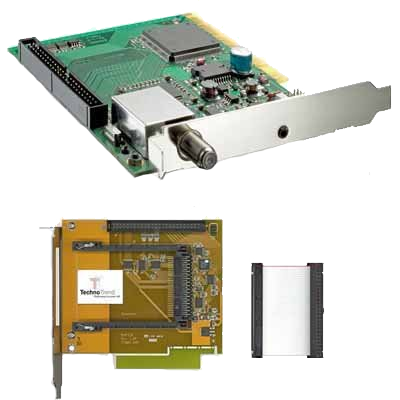
There are many other cards available too that have the necessary driver support and run fine in Linux. The only thing you need to keep in mind that the card must have S2 for being able to handle HD and and MPEG4 support since most TV channels are switching to that format. And when watching encrypted channels you obviously need a CI or Common Interface! If you have a rotor setup onto your satellite dish, be sure to buy a card that supports Diseqc 1.2, when using the twin or duo LNB offered by TV-Vlaanderen, you will have enough with Diseqc 1.0!
Check for a list of Linux supported TV cards here. For a more detailed overview and information of DVB-S2 Linux supported TV cards you can check here:
- PCI: http://linuxtv.org/wiki/index.php/DVB-S2_PCI_Cards
- PCIe: http://linuxtv.org/wiki/index.php/DVB-S2_PCIe_Cards
- USB: http://linuxtv.org/wiki/index.php/DVB-S2_USB_Devices
4.4 The keyboard:
This also comes in handy when building a HTPC or media center, you'll need this regularly when adding/updating channels or when surfing the internet. You could choose an ordinary keyboard and mouse, but what if you just want to sit back and read the newspaper, nosing around on Facebook or even when you are playing a game?! Thinking about this I found the Logitech diNovo Edge which is a wireless keyboard that uses Bluetooth for making the wireless connection. It also holds a mouse pad so you don't need to buy a mouse and it has native support in Ubuntu 12.04!
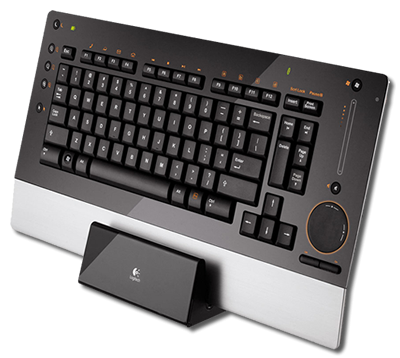
More information: http://www.logitech.com/en-us/support/diNovo-edge?crid=404
4.5 The hardware build:
I will not write the steps how to build the hardware components, since you were looking to build a media-center yourself I will assume you already have some form of experience building pc's from scratch and you're only looking up information on which components to choose as well as which software to use. In next articles I will try to write down the steps on how to install the MythBuntu Linux and what options to choose to get it working with your satellite setup .
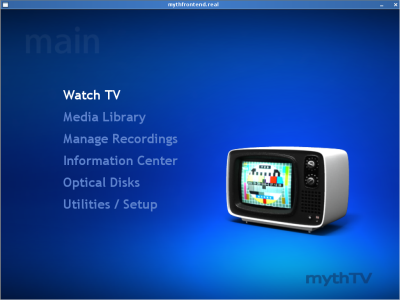
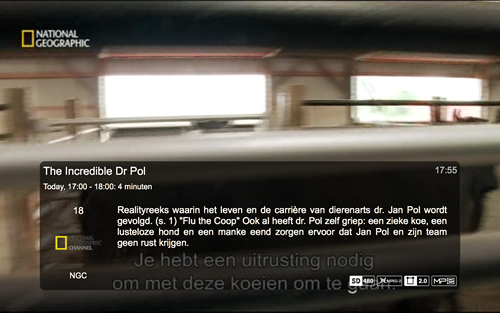
5. MythTV examples:
Here some examples of MythTV playing TV-Vlaanderen channels:
5.1. National Geographic:
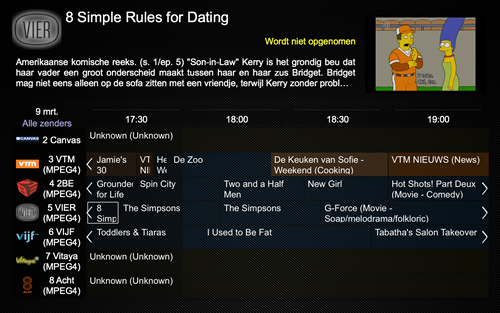
5.2. Vier:

5.3. MythTV program guide (not all EPG data was loaded yet):
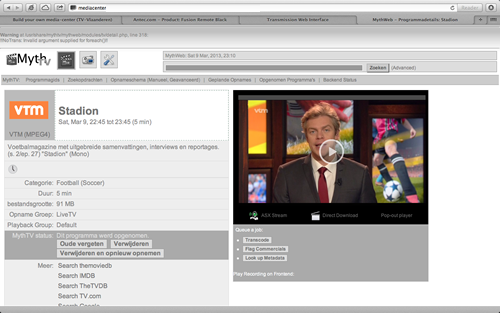
5.4. MythTV web program guide (Mythweb):
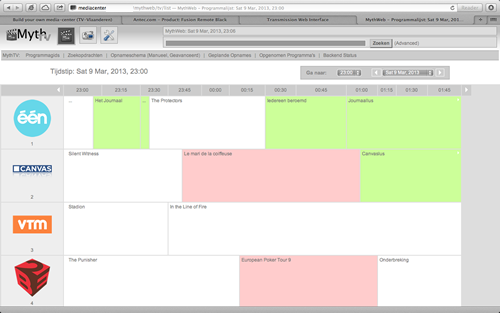
5.5. MythTV web program guide (Mythweb):
Viewing details of a recorded program: